异步任务
1.首先在springboot工程里添加一个service
2.创建一个类AnsycService
关于异步任务还是非常有用的,比如我们在网站上发送邮件,后台会去发送邮件,此时前台会造成相应不动,直到邮件发送完毕,才会相应成功,会使我们的网站处于罚站的状态,所以我们一般会采用多线程的方式去处理这些任务。
编写方法,假装正在处理数据,使用线程设置延时,模拟同步等待的状态。
1
2
3
4
5
6
7
8
9
10
11
12
13
14
15
16
17
18
19
20
21
| package com.bestrookie.sercive;
import org.springframework.scheduling.annotation.Async;
import org.springframework.stereotype.Service;
@Service
public class AsyncService {
public void hello(){
try {
Thread.sleep(3000);
} catch (InterruptedException e) {
e.printStackTrace();
}
System.out.println("数据加载中");
}
}
|
3.编写controller包
4.我们去写一下我们controller类
好了我们来写一下我们的AsyncController类
1
2
3
4
5
6
7
8
9
10
11
12
13
14
15
16
17
18
19
20
21
| package com.bestrookie.controller;
import com.bestrookie.sercive.AsyncService;
import org.springframework.beans.factory.annotation.Autowired;
import org.springframework.web.bind.annotation.RequestMapping;
import org.springframework.web.bind.annotation.RestController;
@RestController
public class AsyncController {
@Autowired
AsyncService asyncService;
@RequestMapping("/hello")
public String hello(){
asyncService.hello();
return "ok";
}
}
|
5.访问一下我们的localhost
发现是三秒之后才出现ok,这就是同步等待的情况。如果我们想让用户直接得到消息,那我们就在后台使用多线程的方式进行处理即可,但是每次都需要我们手动去编写多线程的实现的话,太麻烦了,我们只需要一个简单的方法就是直接添加注解
6.给hello类添加@Async注解
1
2
3
4
5
6
7
8
9
10
11
12
13
14
15
16
17
18
19
20
21
22
| package com.bestrookie.sercive;
import org.springframework.scheduling.annotation.Async;
import org.springframework.stereotype.Service;
@Service
public class AsyncService {
@Async
public void hello(){
try {
Thread.sleep(3000);
} catch (InterruptedException e) {
e.printStackTrace();
}
System.out.println("数据加载中");
}
}
|
要想使用这个注解我们得在我们的主程序上添加一个@EnableAsync开启一部注解功能,springboot就会自己开一个线程池进行调用。
1
2
3
4
5
6
7
8
9
10
11
12
13
14
15
16
17
18
| package com.bestrookie;
import org.springframework.boot.SpringApplication;
import org.springframework.boot.autoconfigure.SpringBootApplication;
import org.springframework.scheduling.annotation.EnableAsync;
import org.springframework.scheduling.annotation.EnableScheduling;
@SpringBootApplication
@EnableAsync
@EnableScheduling
public class DemoApplication {
public static void main(String[] args) {
SpringApplication.run(DemoApplication.class, args);
}
}
|
7.重新测试,网页瞬间相应,后台的代码依旧执行
定时任务
项目开发中经常需要执行一些定时任务,比如需要在每天凌晨的时候,分析一次前一天的日志信息,Spring为我们提供了异步执行任务调度的方式,提供了两个接口。
- TaskExecutor接口
- TaskScheduler接口
两个注解
- @EnableScheduling
- @Scheduled
1.首先我们创建一个ScheduledService
我们在里面写一个hello方法,他需要定时执行
1
2
3
4
5
6
7
8
9
10
11
12
13
14
15
16
17
| package com.bestrookie.sercive;
import org.springframework.scheduling.annotation.Scheduled;
import org.springframework.stereotype.Service;
@Service
public class ScheduledService {
@Scheduled(cron = "5 37 15 * * ?")
public void hello(){
System.out.println("hello,你被执行了");
}
}
|
2.我们写完定时任务之后,我们同样需要在主程序上开启这个功能添加@EnableScheduling
1
2
3
4
5
6
7
8
9
10
11
12
13
14
15
16
17
| package com.bestrookie;
import org.springframework.boot.SpringApplication;
import org.springframework.boot.autoconfigure.SpringBootApplication;
import org.springframework.scheduling.annotation.EnableAsync;
import org.springframework.scheduling.annotation.EnableScheduling;
@SpringBootApplication
@EnableAsync
@EnableScheduling
public class DemoApplication {
public static void main(String[] args) {
SpringApplication.run(DemoApplication.class, args);
}
}
|
3.常用cron表达式
1
2
3
4
5
6
7
8
9
10
11
12
13
14
15
16
17
18
19
20
21
22
23
24
| (1)0/2 * * * * ? 表示每2秒 执行任务
(2)0 0/2 * * * ? 表示每2分钟 执行任务
(3)0 0 2 1 * ? 表示在每月的1日的凌晨2点调整任务
(4)0 15 10 ? * MON-FRI 表示周一到周五每天上午10:15执行作业
(5)0 15 10 ? 6L 2002-2006 表示2002-2006年的每个月的最后一个星期五上午10:15执行作
(6)0 0 10,14,16 * * ? 每天上午10点,下午2点,4点
(7)0 0/30 9-17 * * ? 朝九晚五工作时间内每半小时
(8)0 0 12 ? * WED 表示每个星期三中午12点
(9)0 0 12 * * ? 每天中午12点触发
(10)0 15 10 ? * * 每天上午10:15触发
(11)0 15 10 * * ? 每天上午10:15触发
(12)0 15 10 * * ? 每天上午10:15触发
(13)0 15 10 * * ? 2005 2005年的每天上午10:15触发
(14)0 * 14 * * ? 在每天下午2点到下午2:59期间的每1分钟触发
(15)0 0/5 14 * * ? 在每天下午2点到下午2:55期间的每5分钟触发
(16)0 0/5 14,18 * * ? 在每天下午2点到2:55期间和下午6点到6:55期间的每5分钟触发
(17)0 0-5 14 * * ? 在每天下午2点到下午2:05期间的每1分钟触发
(18)0 10,44 14 ? 3 WED 每年三月的星期三的下午2:10和2:44触发
(19)0 15 10 ? * MON-FRI 周一至周五的上午10:15触发
(20)0 15 10 15 * ? 每月15日上午10:15触发
(21)0 15 10 L * ? 每月最后一日的上午10:15触发
(22)0 15 10 ? * 6L 每月的最后一个星期五上午10:15触发
(23)0 15 10 ? * 6L 2002-2005 2002年至2005年的每月的最后一个星期五上午10:15触发
(24)0 15 10 ? * 6#3 每月的第三个星期五上午10:15触发
|
邮件任务
邮件发送,在我们的日常开发中,也非常的多,Springboot也帮我们做了支持
- 邮件发送需要引入spring-boot-start-mail
- SpringBoot 自动配置MailSenderAutoConfiguration
- 定义MailProperties内容,配置在application.yml中
- 自动装配JavaMailSender
- 测试邮件发送
1.首先我们导入相应的pom依赖
1
2
3
4
| <dependency>
<groupId>org.springframework.boot</groupId>
<artifactId>spring-boot-starter-mail</artifactId>
</dependency>
|
2.我们去更改我们的配置文件
yaml
1
2
3
4
5
6
7
8
9
10
11
12
13
| spring:
devtools:
restart:
enabled: true
mail:
username: bestrookie@qq.com
password: 你的授权码
host: smtp.qq.com
properties:
mail:
smtp:
ssl:
enable: true
|
xml
1
2
3
4
5
| spring.mail.username=24736743@qq.com
spring.mail.password=你的qq授权码
spring.mail.host=smtp.qq.com
# qq需要配置ssl
spring.mail.properties.mail.smtp.ssl.enable=true
|
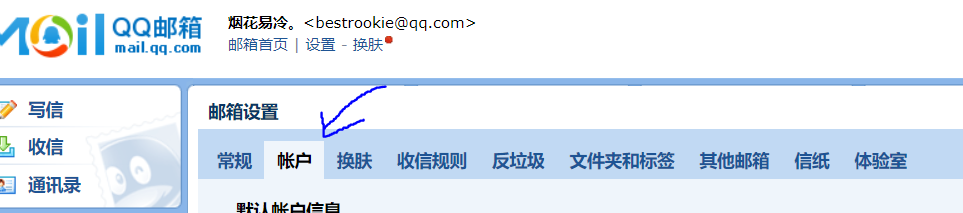
怎么获取授权码呢,本测试用的是QQ邮箱,点击账户->开启pop3和smtp服务

4.好了下样例包含了一个简单邮件一个复杂邮件(在单元测试里写的哦)
1
2
3
4
5
6
7
8
9
10
11
12
13
14
15
16
17
18
19
20
21
22
23
24
25
26
27
28
29
30
31
32
33
34
35
36
37
38
39
40
41
42
43
44
45
46
47
| package com.bestrookie;
import org.junit.jupiter.api.Test;
import org.springframework.beans.factory.annotation.Autowired;
import org.springframework.boot.test.context.SpringBootTest;
import org.springframework.mail.SimpleMailMessage;
import org.springframework.mail.javamail.JavaMailSenderImpl;
import org.springframework.mail.javamail.MimeMailMessage;
import org.springframework.mail.javamail.MimeMessageHelper;
import javax.mail.MessagingException;
import javax.mail.internet.MimeMessage;
import java.io.File;
@SpringBootTest
class DemoApplicationTests {
@Autowired
JavaMailSenderImpl mailSender;
@Test
void contextLoads() {
SimpleMailMessage mailMessage = new SimpleMailMessage();
mailMessage.setSubject("沙雕何江");
mailMessage.setText("1111");
mailMessage.setTo("bestrookie@qq.com");
mailMessage.setFrom("bestrookie@qq.com");
mailSender.send(mailMessage);
}
@Test
void ccontextLoads2() throws MessagingException {
MimeMessage mimeMessage = mailSender.createMimeMessage();
MimeMessageHelper helper = new MimeMessageHelper(mimeMessage,true);
helper.setSubject("沙雕何江");
helper.setText("<p style ='color:red'>2222</p>",true);
helper.addAttachment("1.png",new File("C:\\Users\\ywl\\Desktop\\1.png"));
helper.addAttachment("2.png",new File("C:\\Users\\ywl\\Desktop\\1.png"));
helper.setTo("bestrookie@qq.com");
helper.setFrom("bestrookie@qq.com");
mailSender.send(mimeMessage);
}
}
|
完结撒花